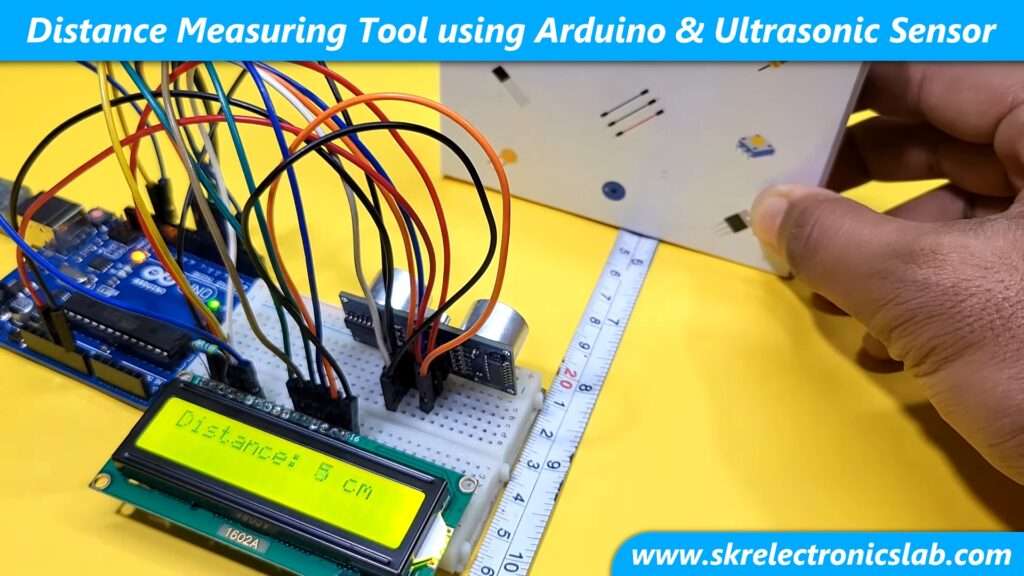
Hello guys, In this tutorial I will show you how to make a distance measuring tool using Arduino and Ultrasonic Sensor. If you are a beginner in Arduino then this project is going to be very interesting for you. Let’s see which components is required to make this project.
Required Components
How Ultrasonic Sensor Works ?
Ultrasonic Sensor uses ultrasonic waves to measure distance. In an ultrasonic sensor, you will find two ultrasonic transducers. One is the transmitter and another one is the receiver. The transmitter transmits the ultrasonic waves and the receiver receives the ultrasonic wave.
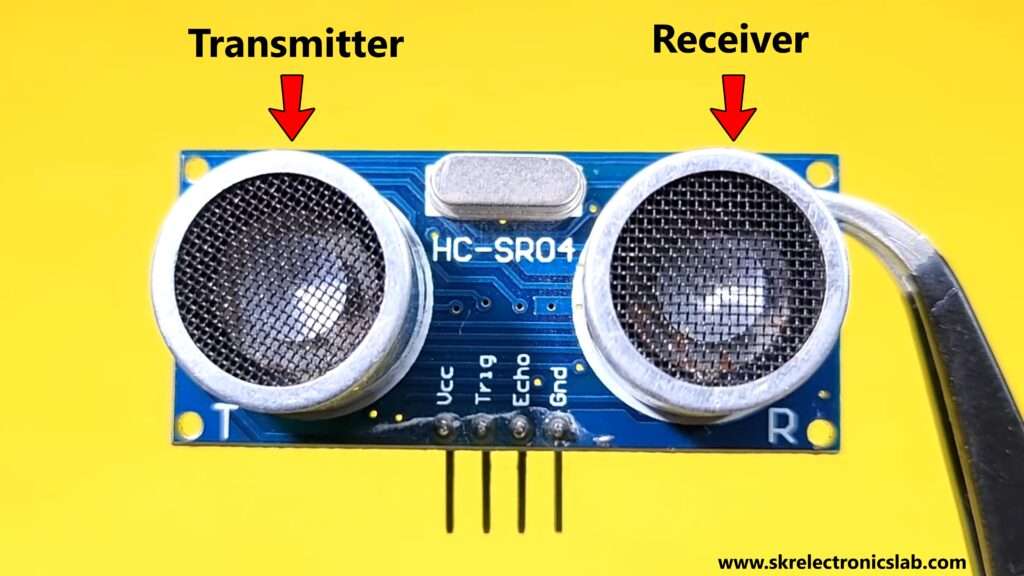
So, when any object comes in front of the ultrasonic sensor then the ultrasonic waves reflect by the object and return to the receiver. Now by calculating the travel time of the ultrasonic wave, we can easily measure the distance between the the object and the ultrasonic sensor.
Working of the Project
First, we need to send a pulse of 10us to the trigger pin of the ultrasonic sensor by Arduino and we will get the output from the echo pin of the ultrasonic sensor.
To calculate the distance we know that Distance = ( Speed x Time). But in our case, the ultrasonic wave travels to the object and is then reflected by the object and returned to the receiver. So, to calculate the distance between the object and the ultrasonic sensor we have to divide the distance by 2. So, the formula will be Distance = ( Speed x Time )/2.
We know that the speed of sound in air is 340 m/s or 0.0343 cm/µs
Hence, the formula will be Distance = (Time x 0.034)/2.
Now using this formula we can calculate the distance.
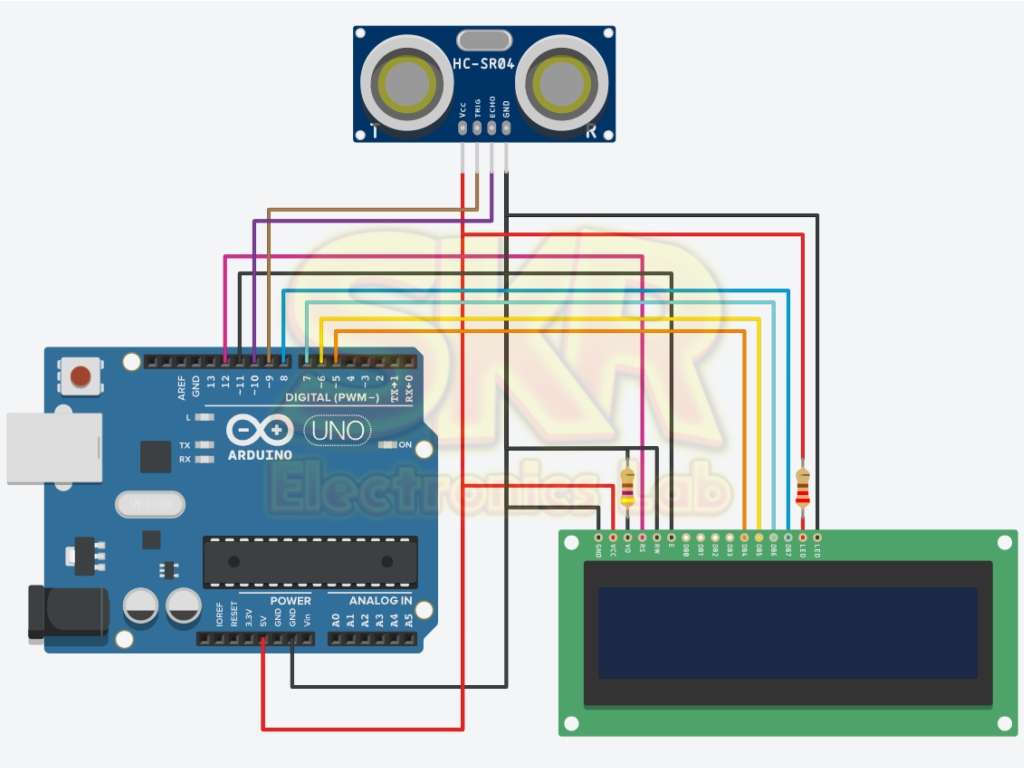
Circuit Diagram
Arduino Code with Explanation
This line includes the “LiquidCrystal” library which provides the function to control the 16*2 LCD diasplay
The above lines are used to define the Arduino pins connected to the LCD RS, EN, D4, D5, D6 & D7.
The last line “LiquidCrystal lcd(rs, en, d4, d5, d6, d7);” creates an instance of the LiquidCrystal class, associating the PINs with their respective LCD connections.
These lines are used to assigning the pins for Ultrasonic Sensor.
This “lcd.begin(16, 2);” initializes 16 columns and 2 rows to display the text on the LCD.
These two lines set the Trigger pin as output and the Echo pin as input of the Ultrasonic Sensor
This line starts the serial monitor at a baud rate of 9600 nits per second
This line clears the previous data to show the new data on the LCD.
These lines are used to generate the triggering pulses for the Ultrasonic Sensor.
It measures and saves time in the duration variable taken by the ultrasonic wave to return to the sensor by reflecting the object. And this is done by using the function ” pulseIn() “.
This line calculates the distance by using the formula that I have explained in the above
These lines are used to print the calculated distance on the LCD display.
These lines are used to print the calculated distance on the serial monitor.
This line provides a delay of 500 ms to prevent the measurement from being too frequent and to display the text on the LCD display smoothly without flickering.
Full Code
Tutorial & Testing Video
Impact-Site-Verification: eb45ba7d-9a2e-44d9-b986-f42a7f9354b4