Introduction
As time goes by, people are getting more advanced, new technology is coming in the market, everything is getting automated. I didn’t like waking up every morning to water the plants. So I thought that if this task could be automated, then it would be great. But I didn’t have any Arduino or soil moisture sensor. After some thought, I decided that I will make the project without Arduino and ready-made soil moisture sensor. And finally, I made the project with some common electronic components at home. This circuit can check the soil moisture and turn the water pump on or off automatically. The circuit is very easy to make, if you are looking for a project for your school or college science project then you can make it, because it is very easy to make and very cheap to make. So let’s see how to make this project.
Required component’s :
- IRFZ44N Mosfet
- 3V Water Pump
- 10K Resistor
- 50K Potentiometer
- 3.7v Battery
- Switch
- 22 to 24 Gauge Copper Wire
- Small piece of Zero PCB (Optional)
Circuit Diagram :
Soil Moisture Sensor making :
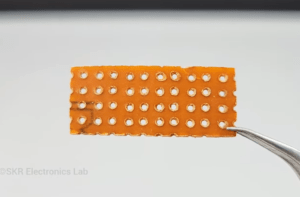
Then we need to take a small piece of Zero PCB. (If you don’t have Zero PCB, you can use a small piece of plastic instead of Zero PCB).
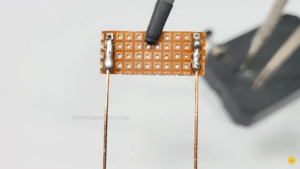
Then we’ve to solder two copper wires on both sides of that zero PCB (If you’re using a piece of plastic instead of Zero PCB then you need to glue the two copper wires to both sides of the plastic)
Then I took the 3.7 vol battery and soldered a black wire to the negative pin of the battery and put a switch in series with the positive pin.


i want to buy this project
Message me on Instagram – https://www.instagram.com/skr_electronics_lab/